Getting Started
1. Introduction
Welcome to the Thinking Robot Smart Garden project!
Have you ever wondered how big farms keep thousands of plants alive without watering each one by hand? They use Automation. In this project, you won't just build a simple watering system; you will build a "Smart Garden Guardian" that watches over three different plants at once.
Using the ESP8266 (a WiFi-capable computer) as the brain, we will monitor the soil moisture of three separate pots. If any single plant gets thirsty, your system will detect it and automatically trigger the water pump to save the day.
Why is this project special? Most DIY kits only handle one plant. This kit teaches you how to manage multiple sensors and distribute water to a cluster of plants using a single pump—just like a real automated greenhouse!
2. What We Will Learn (The Mission)
By the end of this guide, you will have a fully working system and, more importantly, you will understand these core engineering concepts:
- ⚡ Power Distribution: How to safely power high-current devices (motors) and sensitive chips (WIFI) from the same source using a Breadboard Power Module.
- 🧠 Logic Gates: Using "OR Logic" (If Plant A OR Plant B is dry → Pump ON).
- 📡 Sensor Calibration: How to tune analog soil sensors to give digital "Yes/No" signals.
- ☁️ IoT Connectivity: How to send your garden's data to a mobile app so you can monitor it from anywhere
3. Bill of Materials (What's in the Box?)
Before we start building, let's make sure you have all the correct parts on your table.
| Component | Quantity | Description |
|---|---|---|
| ESP8266 (NodeMCU) | 1 | The "Brain" of the project. It connects to WiFi and controls the logic. |
| Soil Moisture Sensors | 3 | Probes that detect if your plants are thirsty. |
| Relemate Connectors | 3 | Long wires to connect the sensors to your breadboard. |
| Mini Water Pump | 1 | Submersible pump to water the plants. |
| 3-Way Distribution Pipe | 1 | A special tube with 3 open ends to water multiple pots at once. |
| Relay / MOSFET Module | 1 | An electric "Switch" that lets the small ESP8266 control the big pump. |
| DHT11 Sensor | 1 | Measures the air temperature and humidity. |
| Breadboard | 1 | The base for building your circuit. |
| Power Supply Module | 1 | plugs into the breadboard to provide clean 3.3V and 5V power. |
| Power Adapter | 1 | plugs into the wall to power the whole system. |
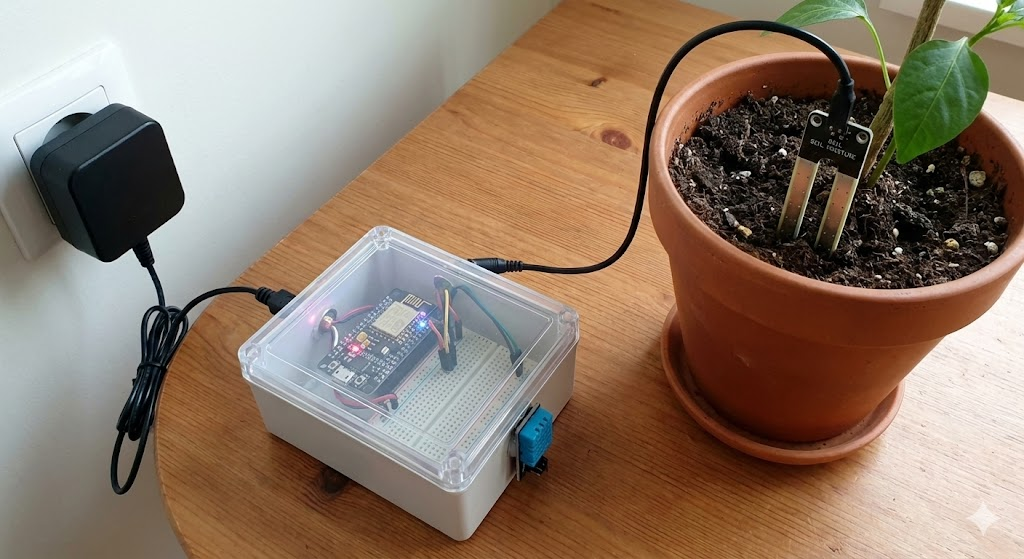
| Enclosure Box | 1 | A case to keep your electronics safe and dry. |
| Mounting Board | 1 | Holds the circuit inside the box. |
4. Safety First ⚠️
Since we are mixing Electricity and Water, we must follow two golden rules:
- Never submerge the sensors past their electronic head (only the gold prongs go in the soil).
- Keep the Brain Dry: The pump goes in the water bucket, but the ESP8266 and Breadboard must stay outside and dry at all times.