The Master Plan.
1. The Master Plan: How it Works
Before we plug in any wires, we need to understand the logic. Building an automated system is just like teaching a robot how to think.
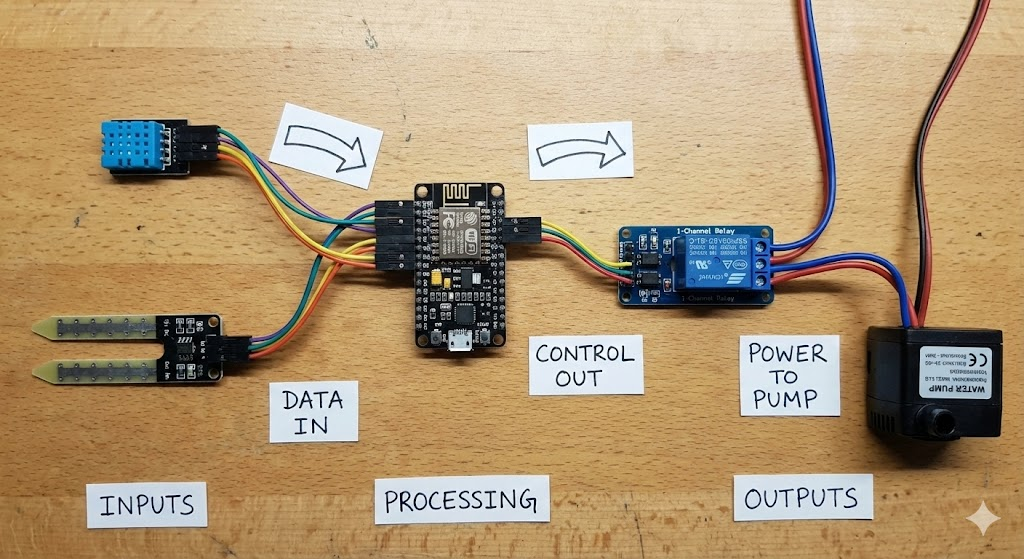
We can break our entire project down into three simple stages: Input, Processing, and Output.
- The Input (The Senses): Just like you touch the soil to feel if it's dry, our system uses a Soil Moisture Sensor. It constantly checks the ground and sends a signal to the brain. We also use a DHT11 Sensor to "feel" the air temperature and humidity.
- The Brain (Processing):
The ESP8266 is the brain. It reads the signal from the sensors and asks a simple question: "Is the soil too dry?"
- If YES: It decides to start the pump.
- If NO: It keeps the pump off and goes back to sleep.
- Bonus: Since the ESP8266 has Wi-Fi, it will also send this data to a Dashboard (which we will build later) so you can see your plant's health on your phone!
- The Output (The Action): The brain cannot power the big pump directly. Instead, it sends a signal to a Relay. The Relay acts like a powerful digital switch, turning the Water Pump ON to water the plant.
2. Meet Your Components
Here is a quick introduction to the parts you found in your kit and the role each one plays.
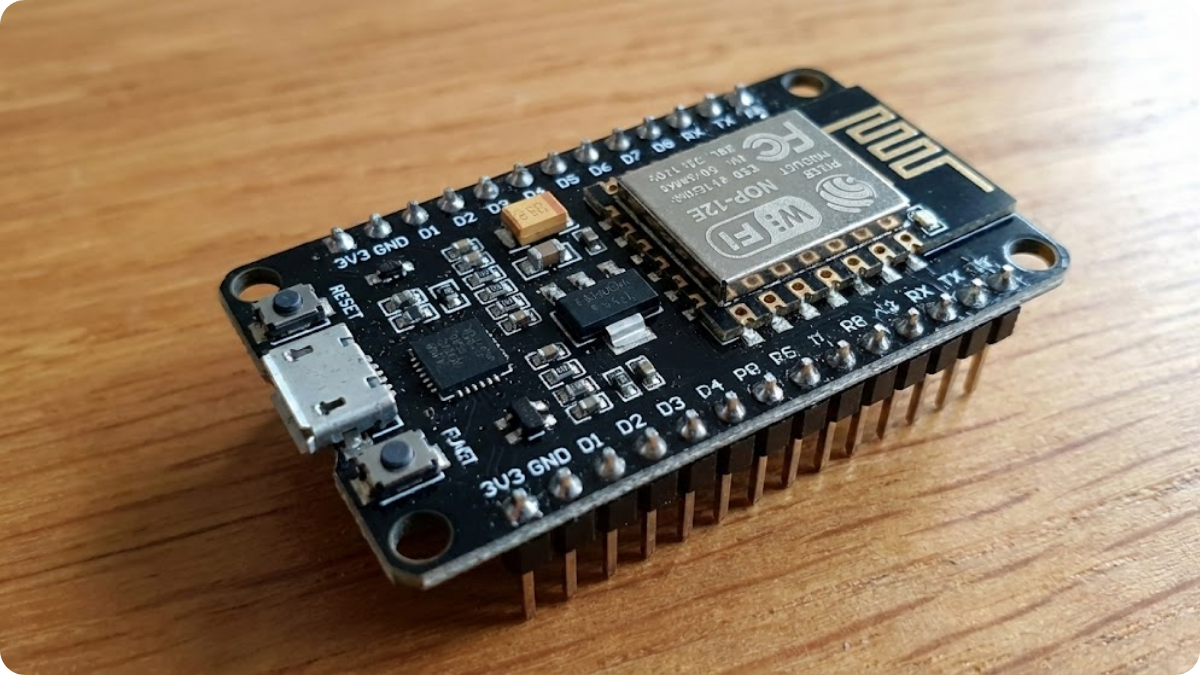
1. The Brain: ESP8266 NodeMCU
This is a powerful microcontroller with built-in Wi-Fi. It is similar to an Arduino but smarter because it can connect to the internet.
- Role: Runs your code, reads sensors, controls the pump, and talks to the web.
2. The Sense: Soil Moisture Sensor
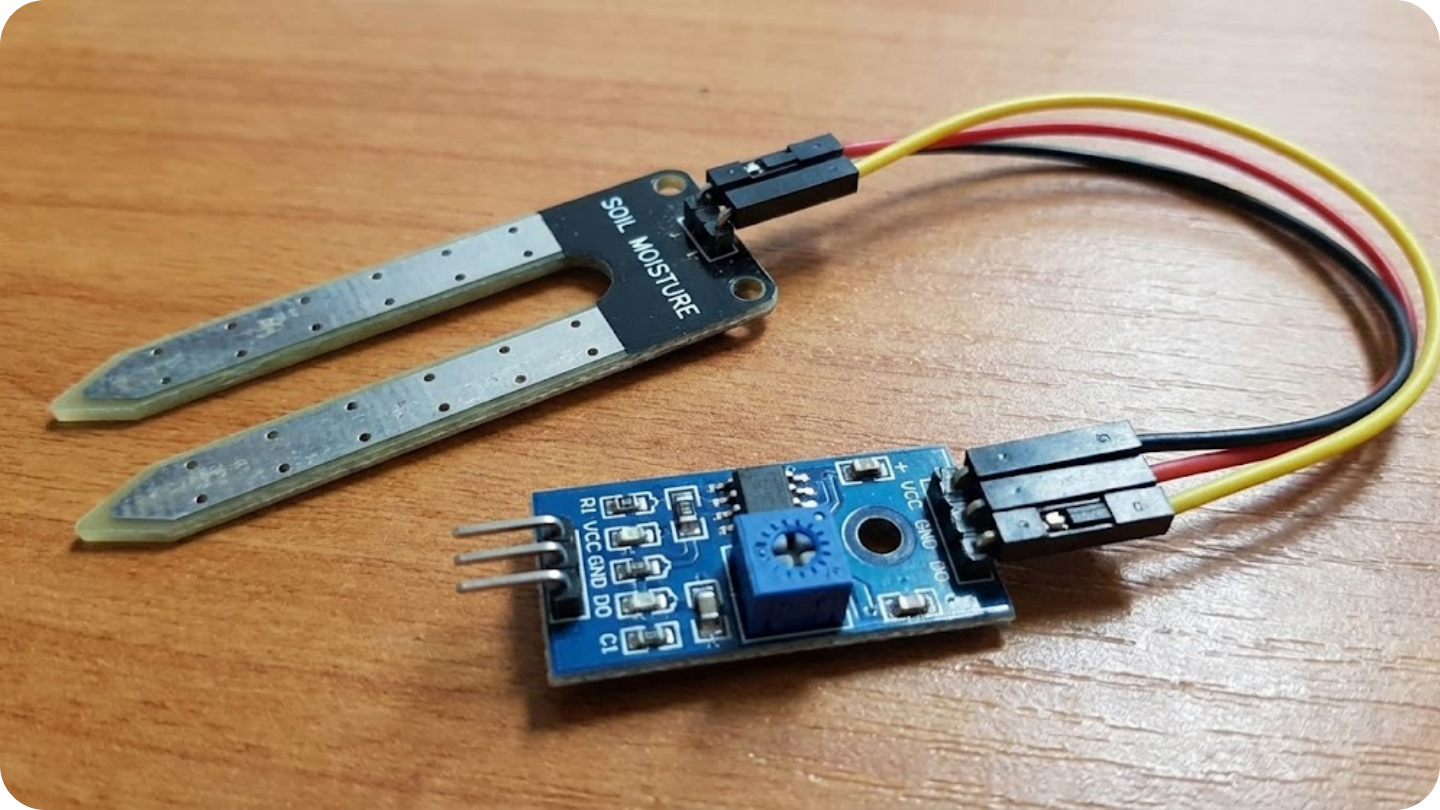
This sensor has two large exposed pads that act as a variable resistor. When water is present in the soil, it conducts electricity better.
- Role: Tells the ESP8266 if the soil is Wet (conductive) or Dry (resistive).
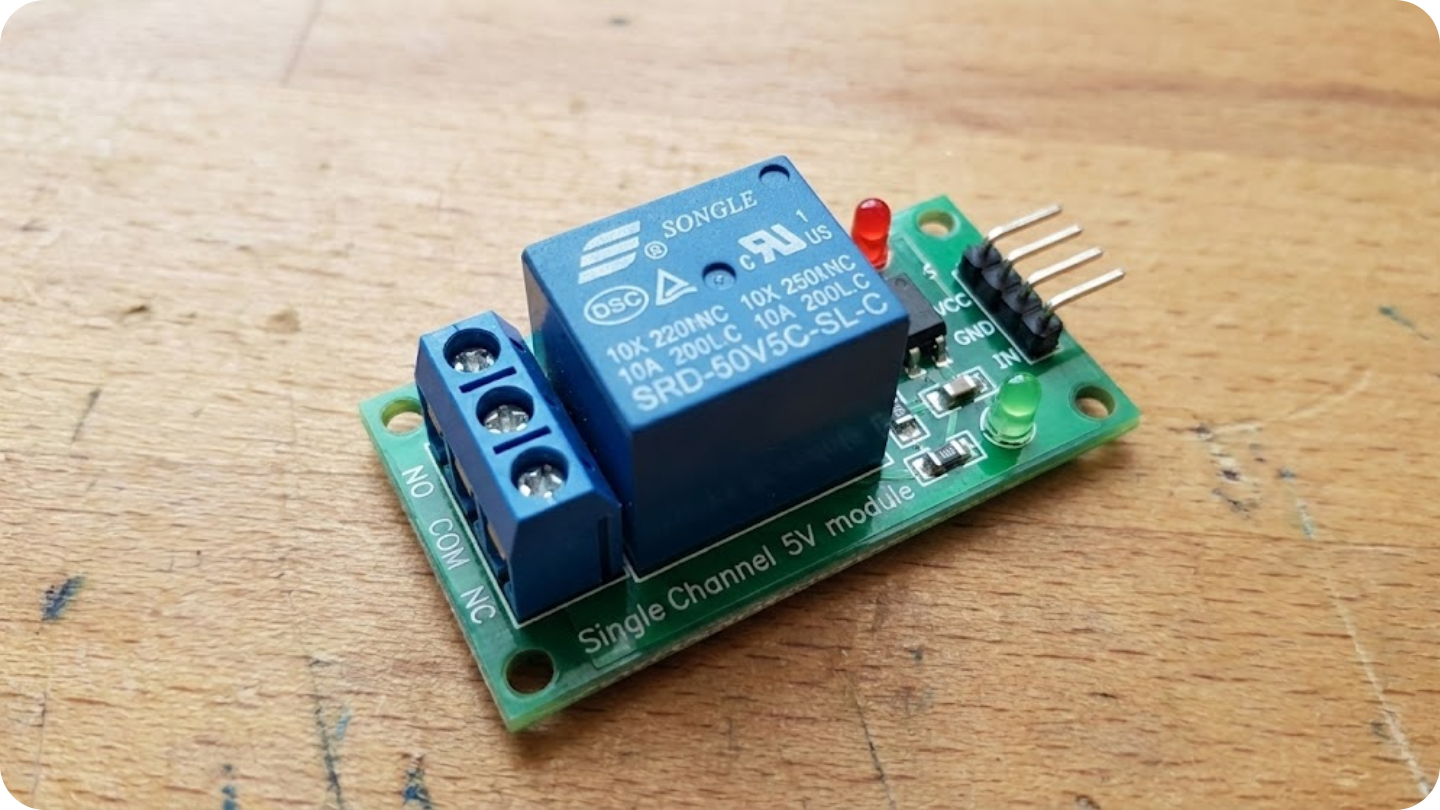
3. The Muscle: Relay Module
Our ESP8266 operates on 3.3 Volts, but our pump is powerful and needs more energy. The Relay is an electromagnetic switch that bridges this gap.
- Role: Allows the small 3.3V signal from the ESP to turn on the high-power circuit for the pump safely.
4. The Worker: Mini Water Pump
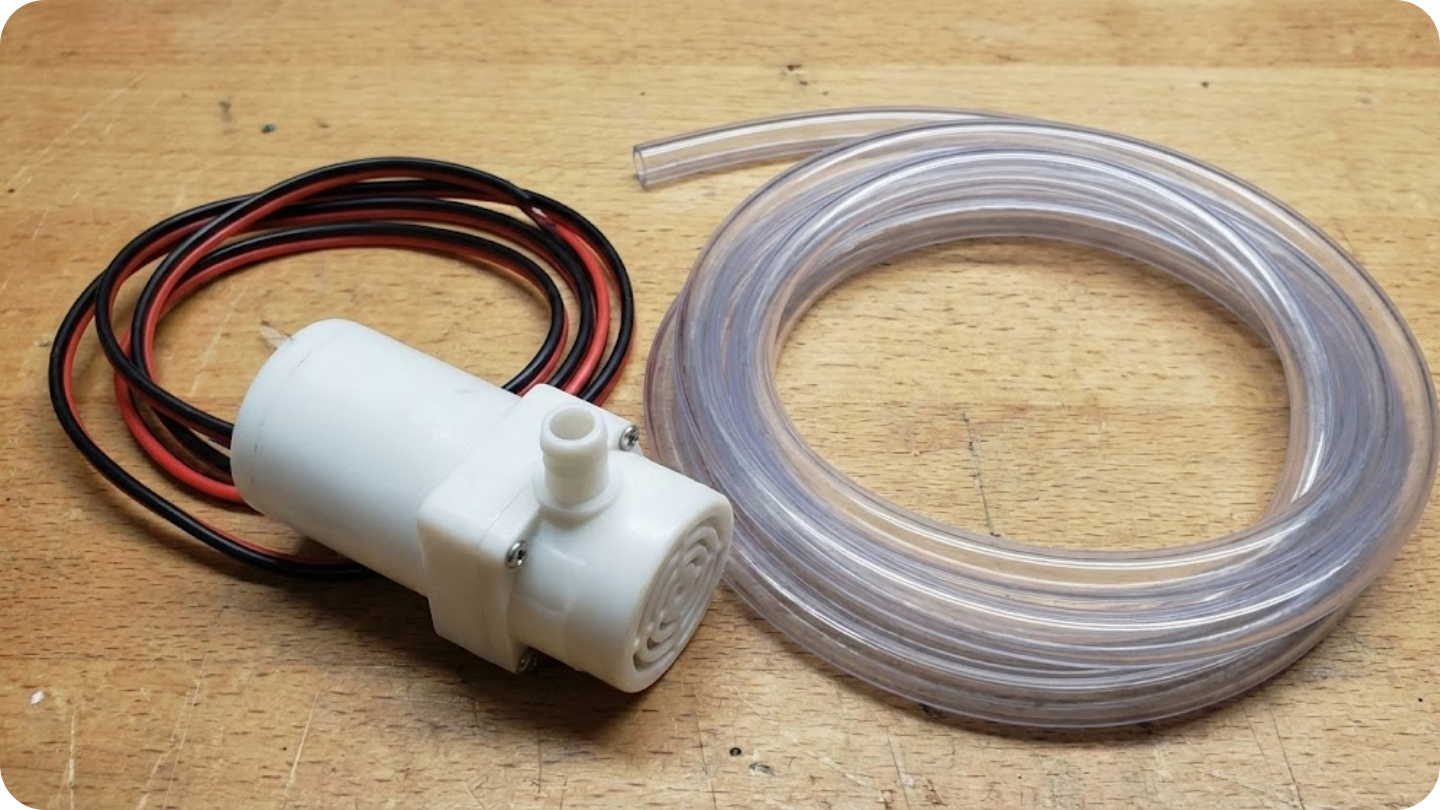
A submersible pump that sucks water in and pushes it out through the vinyl tubing.
- Role: Physically moves water from your reservoir to the plant.
- Important: This pump must always be underwater when running. Running it dry can damage it!
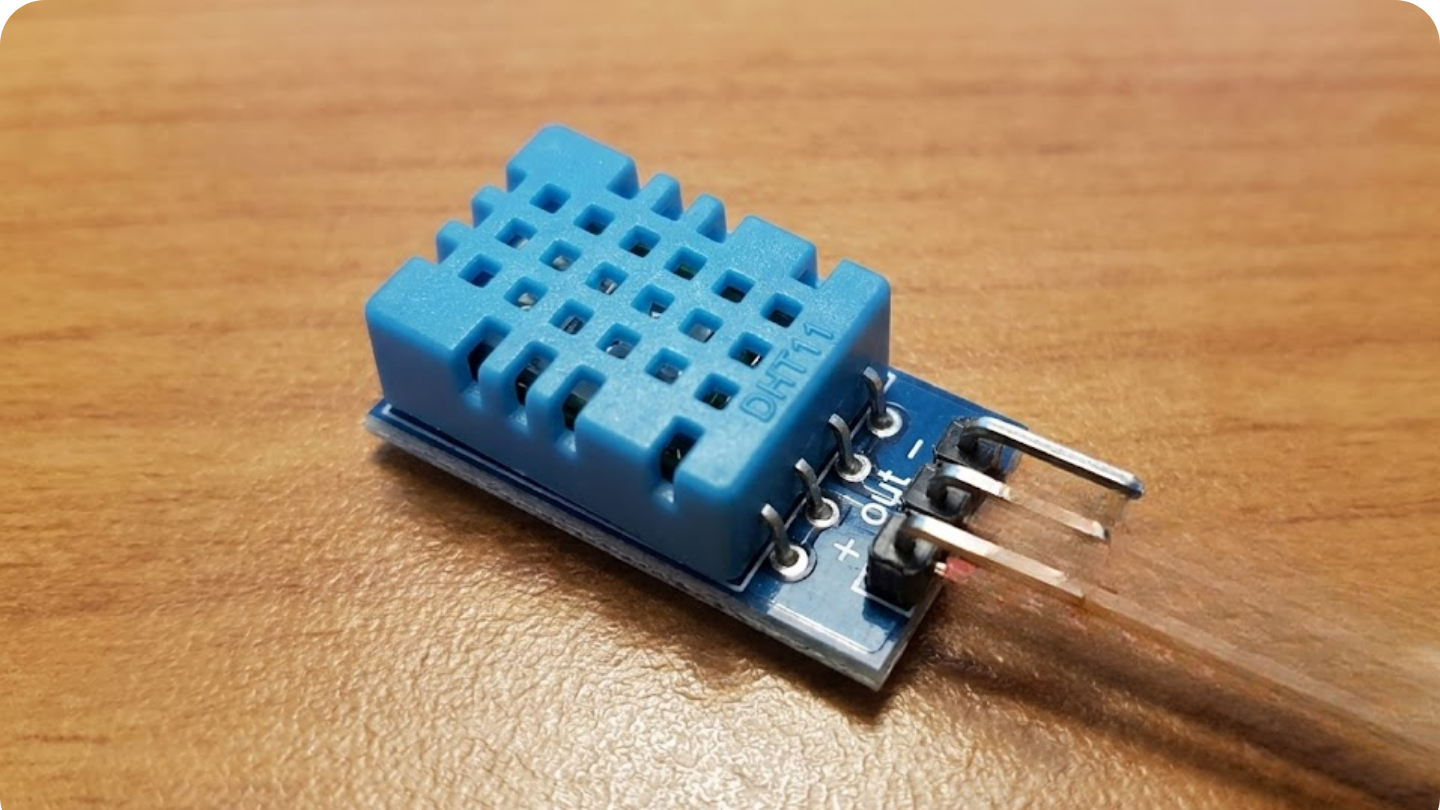
5. The Climate Monitor: DHT11
A blue, grilled sensor that measures the environment.
- Role: Reads the air temperature and humidity percentages. This helps us know if the plant is too hot or cold, regardless of the water level.
3. What We Are Building Today
For this "Getting Started" guide, we will build the Single-Plant Monitor.
We will connect:
- 1x Soil Moisture Sensor
- 1x DHT11 Sensor
- 1x Relay & Pump
- 1x ESP8266
Once you understand how to control one plant, adding the other two sensors for the full "3-Plant System" is as easy as plugging in two more wires!